Publishing a YouTube video is a simple, repeatable process once you know the core steps. This guide walks through each part of the upload flow so you can go from file to published content with confidence: title and description, thumbnails and A/B testing, playlists and audience settings, monetization basics, end screens and cards, and final visibility options.
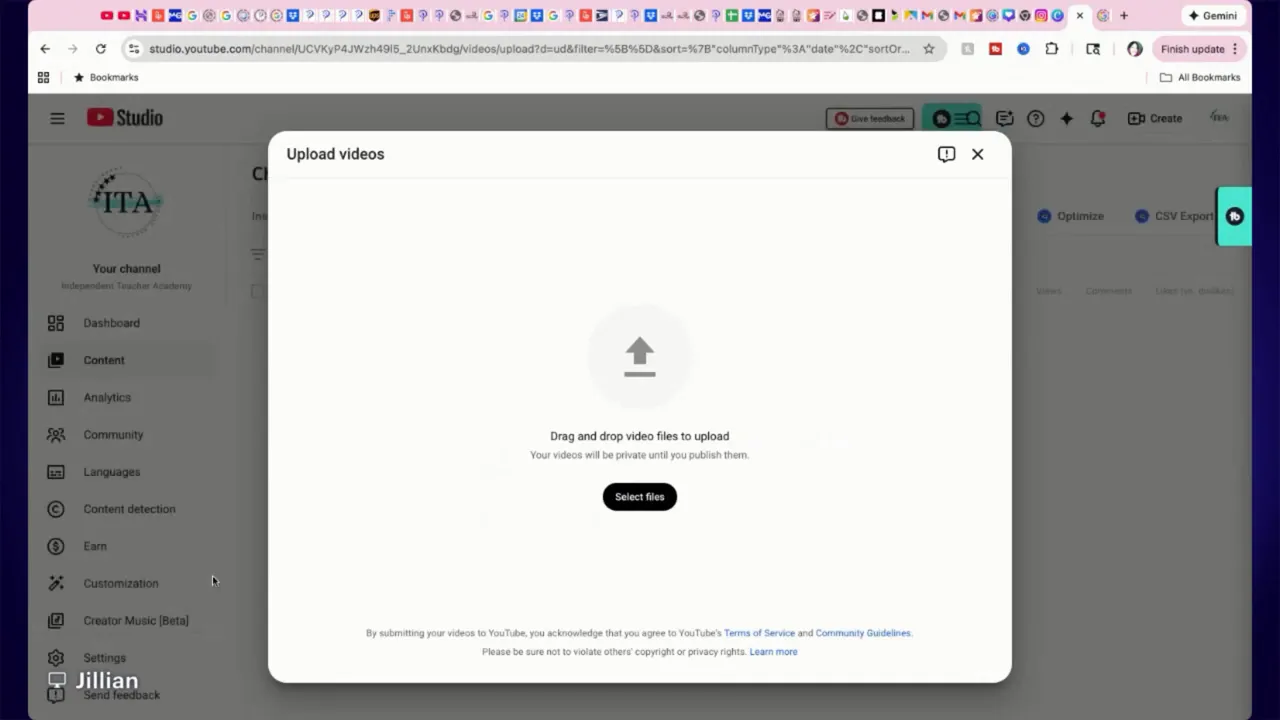
1. Start the Upload
Open the Create menu and choose Upload video. From there you can drag and drop your video file straight into the uploader. The uploader also gives quick access to going live or creating a community post, but focus on Upload to get your content online.
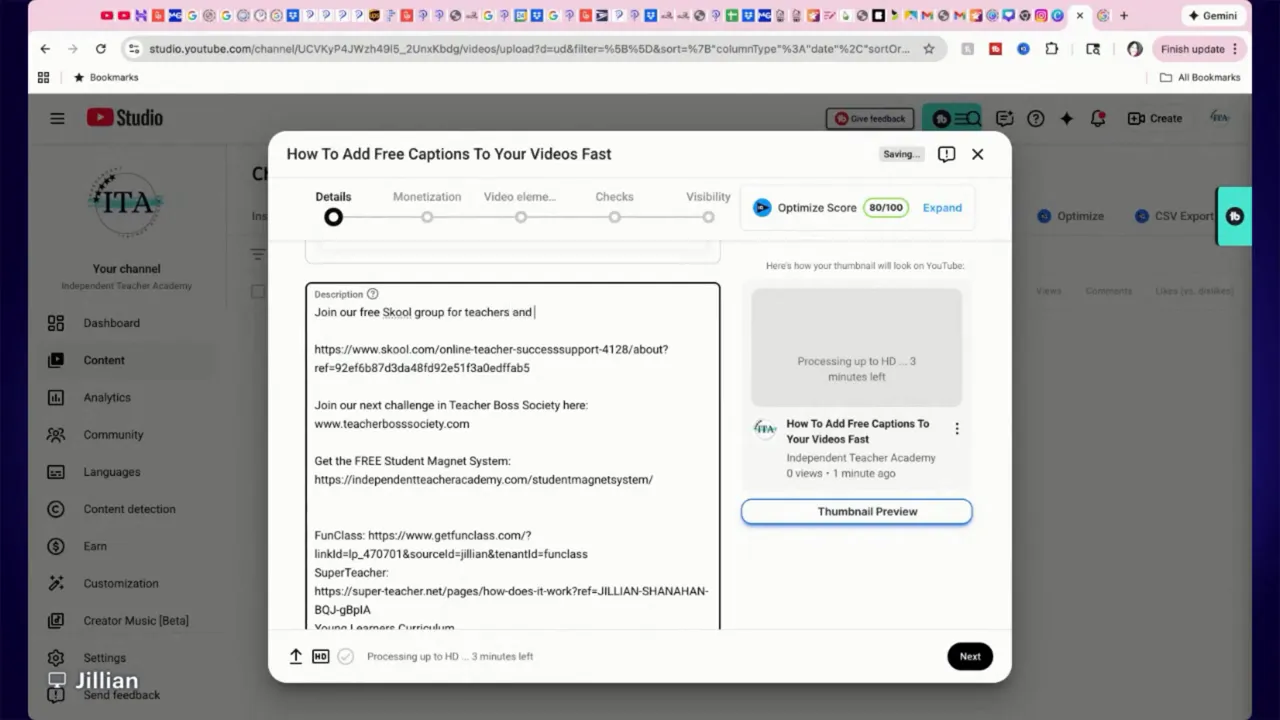
2. Title, Description and Links
Give your file a clear, searchable title and fill the description with useful links and context. Use the description to add an invite link, course links, or other resources so people can act after watching.
Pro tip: Put the most important link and call to action in the first two lines of the description so it’s visible without expanding the text.
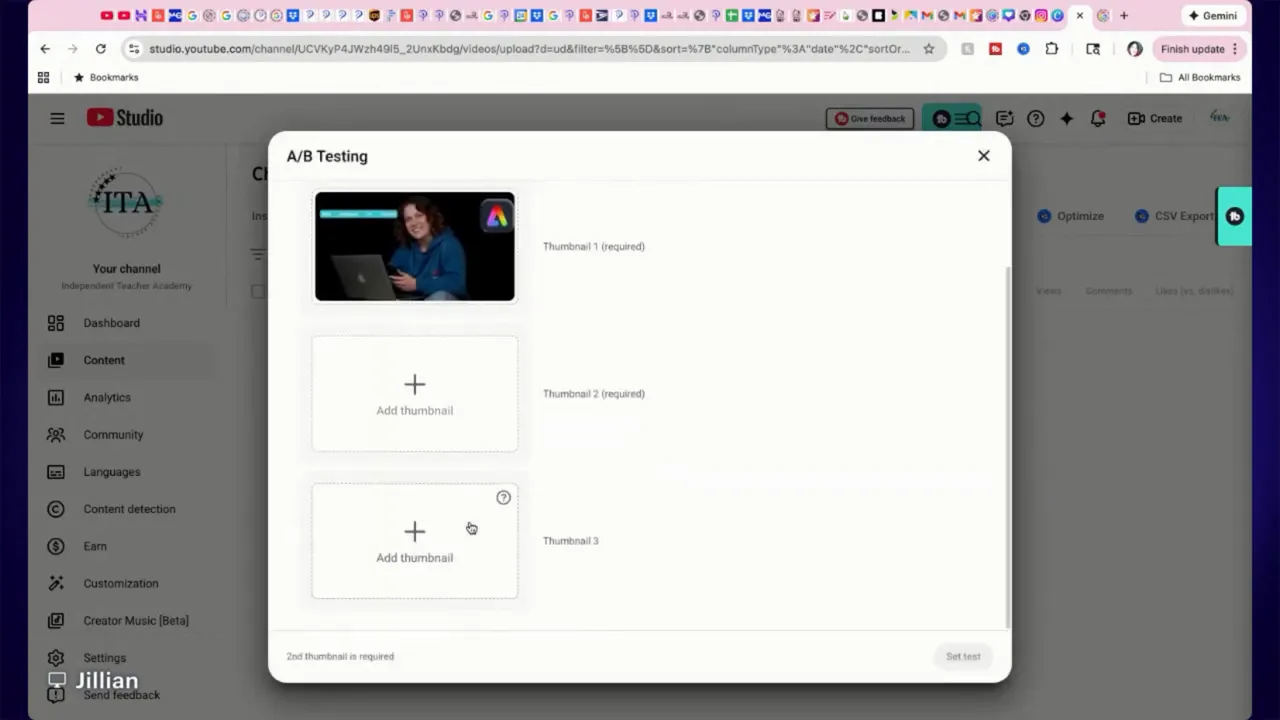
3. Create and Test Thumbnails
A custom thumbnail is one of the biggest factors in getting clicks. Create thumbnails in Canva, Photoshop, or another tool, then drag and drop the image into the thumbnail area.
YouTube now supports A/B thumbnail testing. Upload multiple designs and let the platform determine which performs best. If you don’t want to upload a custom image, YouTube can auto-generate one from your video frames, but a custom thumbnail usually performs better.
If you use tools like VidIQ you can even have AI generate thumbnail options to speed up the process.
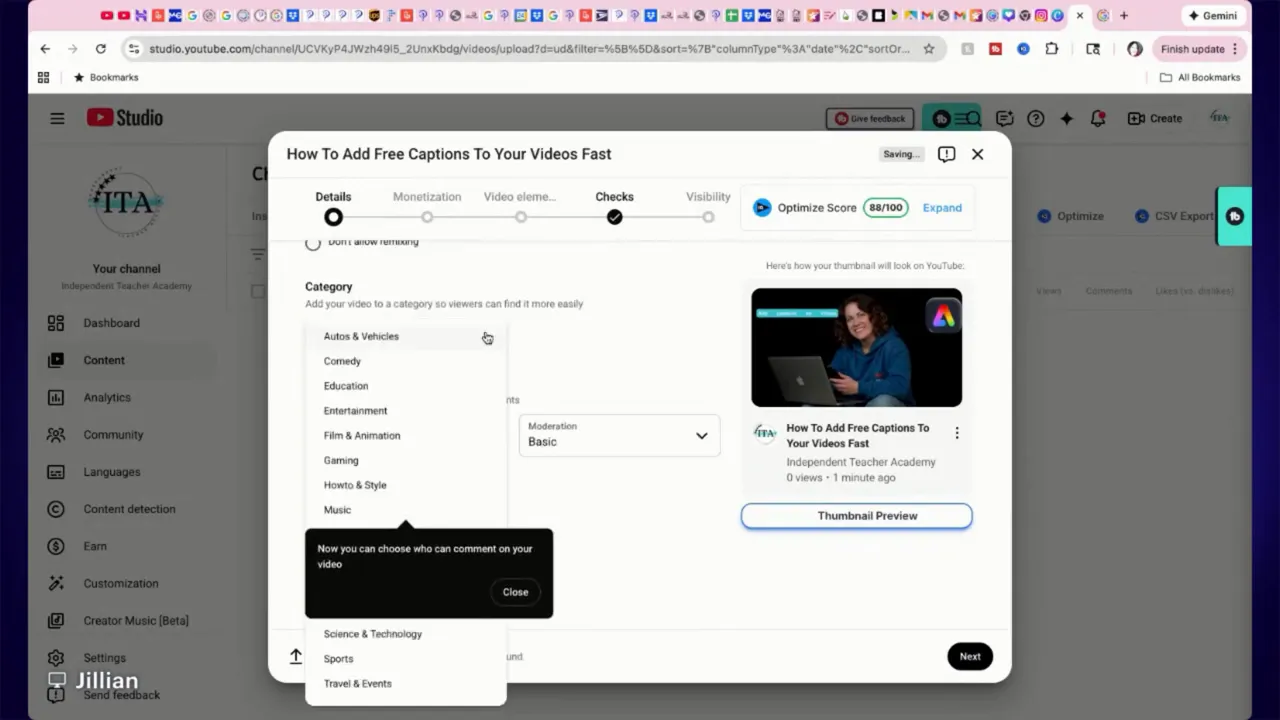
4. Playlists, Audience and Metadata
Add the video to a playlist to improve discoverability and session time. Choose the most relevant playlist so the platform understands the context.
Set the audience flag: mark whether the content is made for kids. Also indicate any product placements, sponsorships, or collaborators. These checkboxes matter for compliance and transparency.
Tags are optional and not as influential as they once were, but adding a few relevant tags can help in niche situations. Choose a category for your video (for example Education) to further clarify intent.
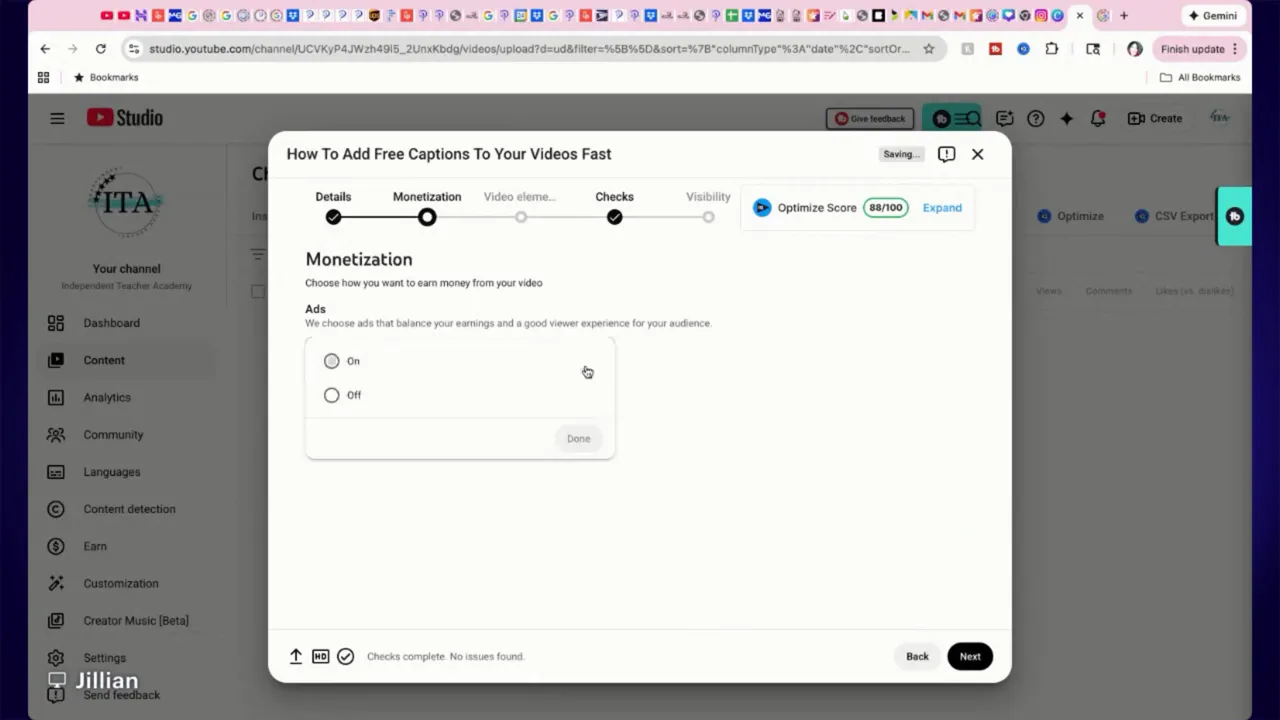
5. Monetization Basics
If your channel is not yet eligible for monetization, the upload flow will still show monetization settings but they will not be active for you. Focus first on consistent uploads and meeting the eligibility requirements for monetization.
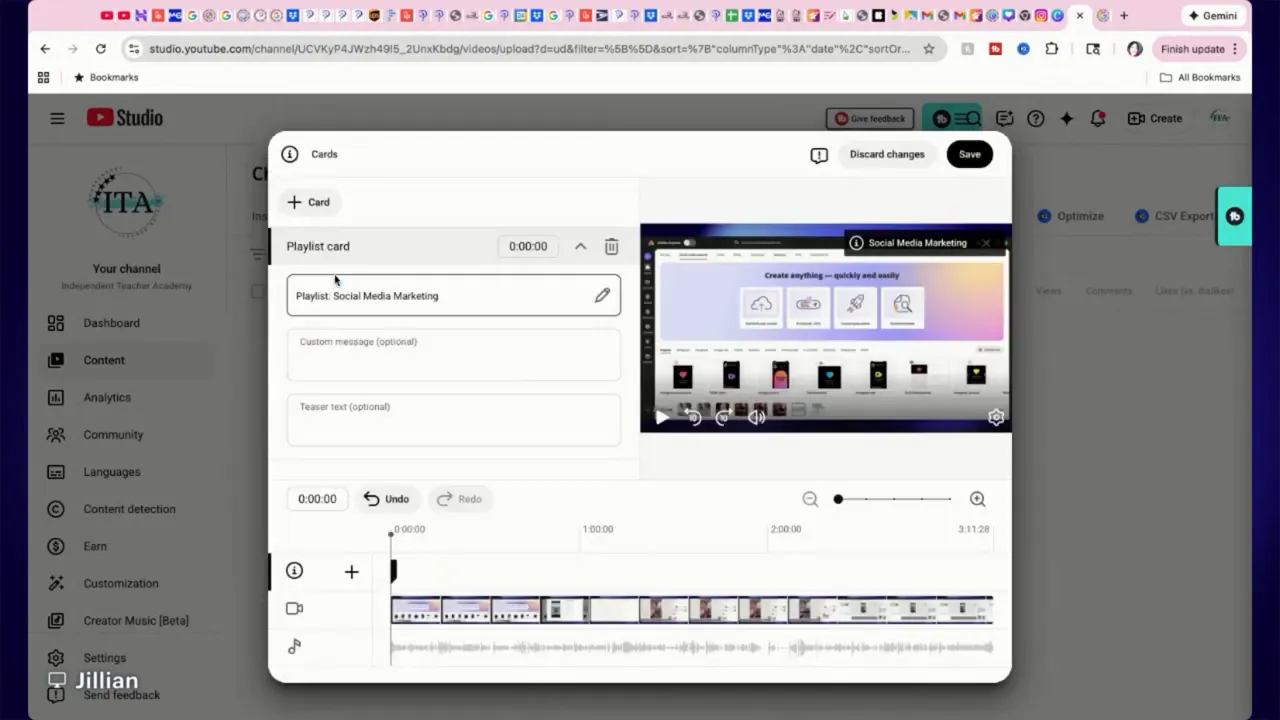
6. End Screens and Cards
End screens encourage continued engagement. Choose from templates like subscribe, one suggested video, or pick a specific video that complements the current content. You can also add your most recent upload to guide the audience to more content.

Cards are visible during playback and can link to a playlist, video, channel, or approved external link. Drag the card to the desired time in the timeline and customize the card text to match the call to action.
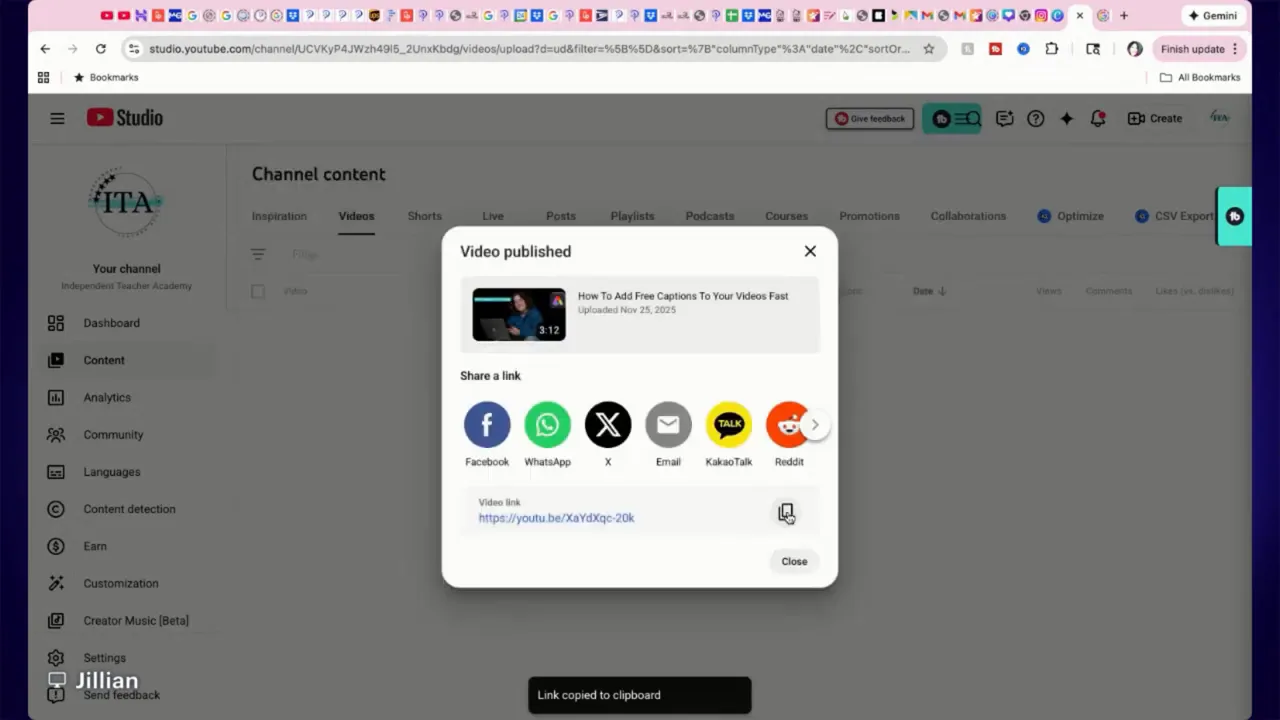
7. Copyright, Visibility and Publishing
Complete the copyright check and then choose your visibility: Private, Unlisted, Members only, or Public. There’s also an option to create an instant premiere to launch with hype and a live chat.
Once you publish, copy the video link and share it in relevant communities or groups where your audience already gathers.
Checklist Before You Hit Publish
- Title is clear and keyword-rich.
- Description includes top links and calls to action.
- Custom thumbnail uploaded and considered for A/B testing.
- Playlist and category set.
- Audience setting configured (not made for kids, if applicable).
- End screens and cards added for next steps.
- Visibility selected and share link copied.
Final Notes
Uploading a first video can feel overwhelming, but the platform guides you through the essential choices. Focus on clear titles, engaging thumbnails, and useful post-upload elements like end screens and cards. Share the published link with the communities where your learners already are to get early traction.
If you want faster results, consider preparing a simple template for thumbnails and descriptions so each upload takes minutes instead of hours.
Small, consistent improvements to thumbnails, descriptions, and end screens compound into meaningful channel growth.
Leave a Reply