Scheduling posts on Xiaohongshu from your desktop is a small productivity win that saves time and helps keep your content consistent. The process is straightforward once you know the key steps: connect your app, make sure the site is translated, choose the right content type, and pick a scheduled release time. Below is a practical, step-by-step guide to get you publishing and scheduling notes from a computer.
Quick overview
Core steps at a glance:
- Log in and connect your phone app via QR code.
- Translate the interface to your preferred language (Chrome makes this easy).
- Open Creative Center & go to Creative Services.
- Create a note (video, images + text, or a long article).
- Choose content metadata, then select Scheduled Release and set the date/time.
- Check Note Management to confirm status and make edits or delete if needed.
Step-by-step: From login to scheduled release
1. Log in and connect your phone
Go to the Xiaohongshu desktop site and sign in with your account. The platform will prompt you to scan a QR code with the Xiaohongshu app on your phone to link the app and the desktop session. This step is required to manage posts from the computer.
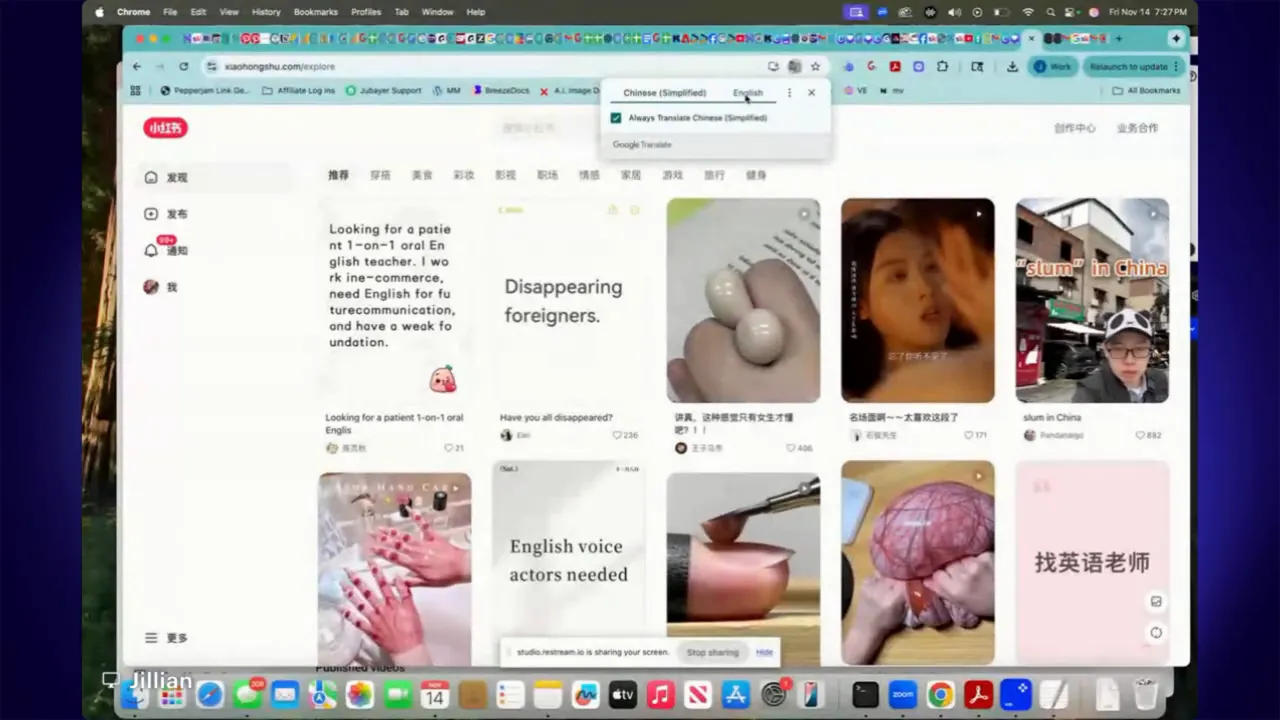
2. Translate the interface
If the site displays in Chinese, use your browser’s translate feature and switch it to English (or your preferred language). On Chrome this appears as a small translate icon in the address bar—click it and select English. This makes all menu items and form fields readable while you create your post.
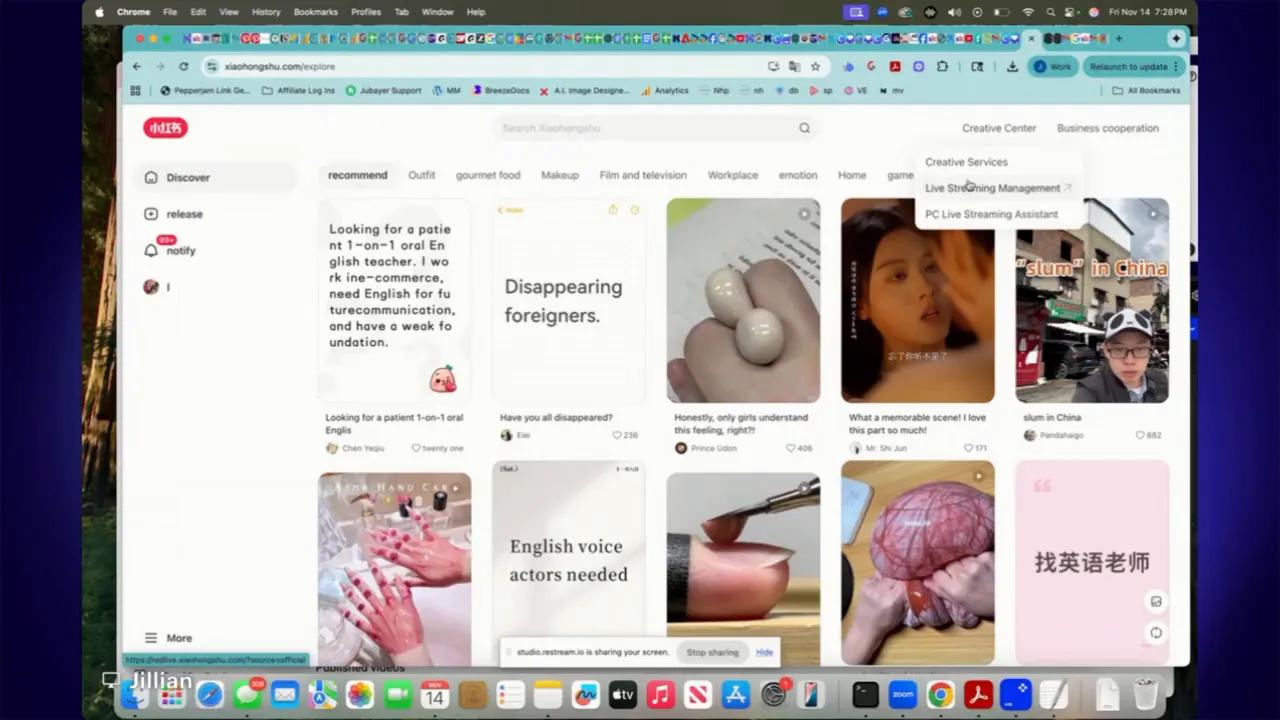
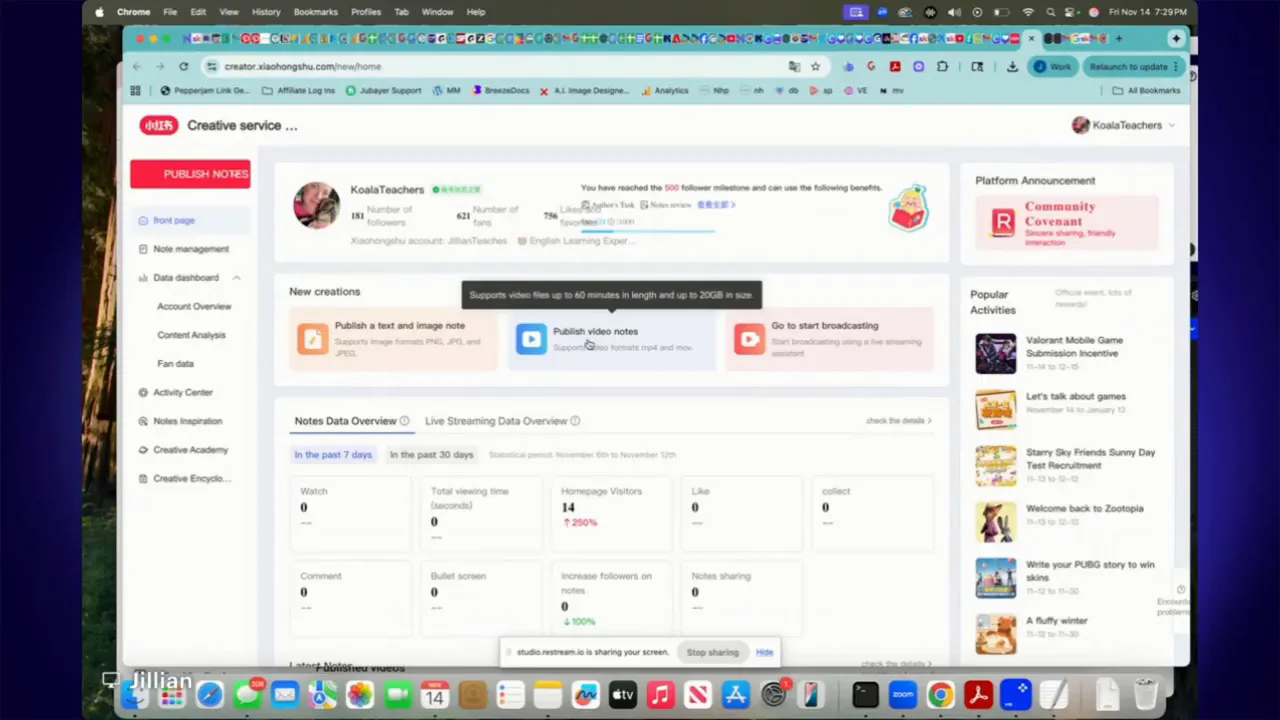
3. Open Creative Center → Creative Services
From the main menu go to Creative Center and then click Creative Services. You might be prompted to scan another QR code when entering this area—scan it if asked. Note: live streaming features are restricted if you are not in or connected to mainland China; however, publishing videos, images, and text is available.
4. Choose how to publish
Inside Creative Services select Publish Notes. You’ll see three main options:
- Upload a video
- Upload images and text (a common choice)
- Write a long-form article
5. Add images and main text
Upload the image(s) you want and enter your main text. Keep captions concise but informative. You can also add a location or place the note into a collection if you want it grouped with other posts. Collections and group posting are optional and can be handled separately if you need specific workflows.
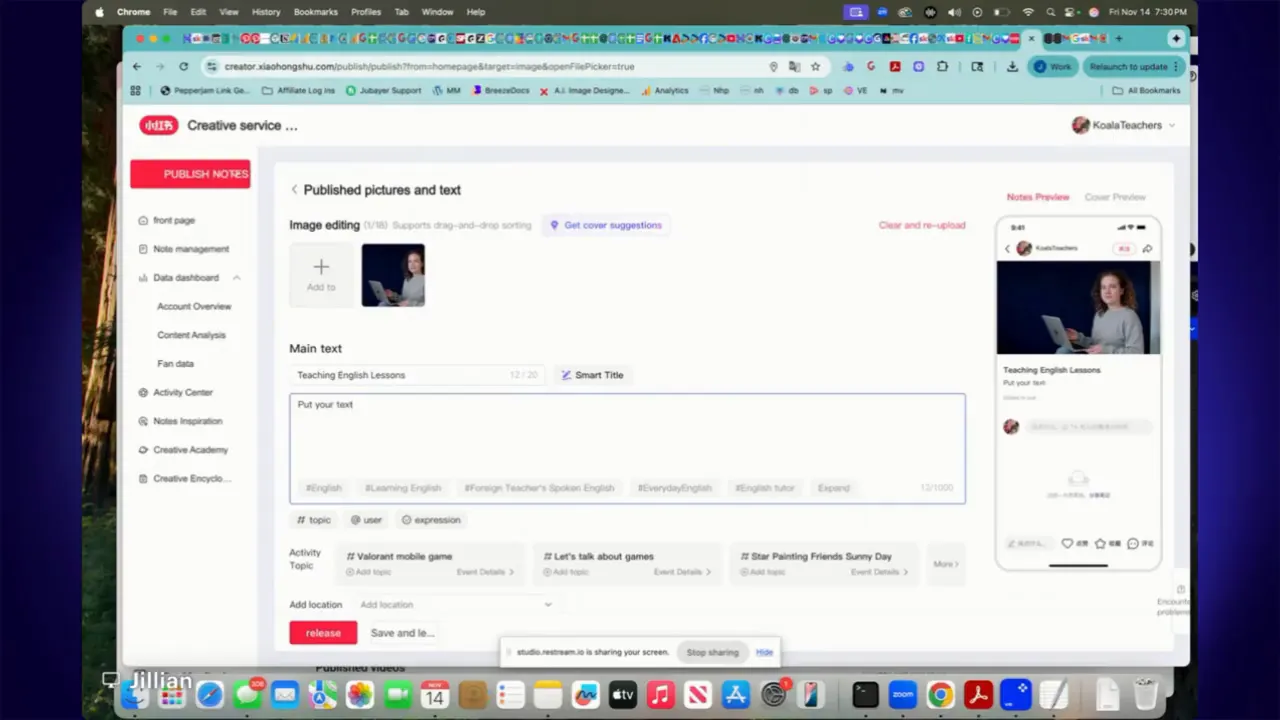
6. Set content metadata
Before scheduling, pick the correct content attributes. Typical fields include whether the note is fictional, whether it contains AI-generated content, whether it is self-shot, or if it is reprinted from another source. These labels help the platform categorize your post and comply with content policies.
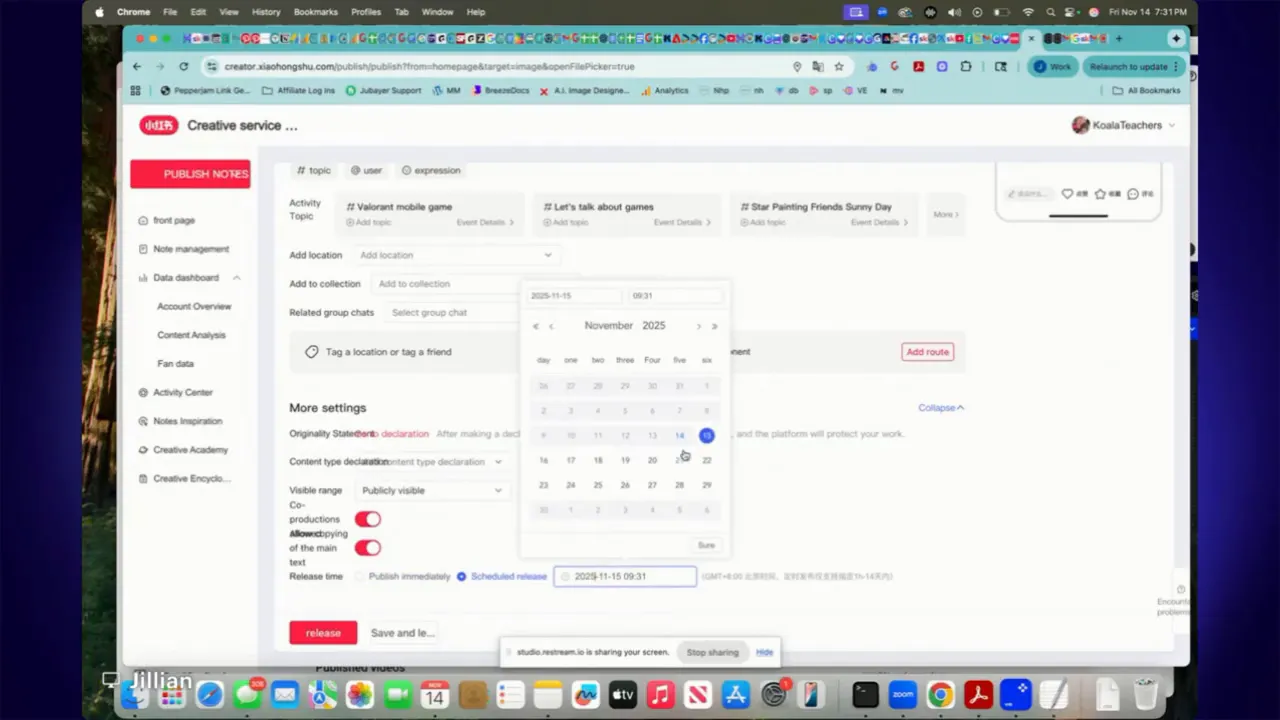
7. Schedule the release
At the bottom of the publish form choose Scheduled Release instead of Publish Immediately. Pick the date and time you want the post to go live (timestamps use Beijing time), then confirm. The post will enter the platform’s review queue and will be released at the scheduled time if approved.
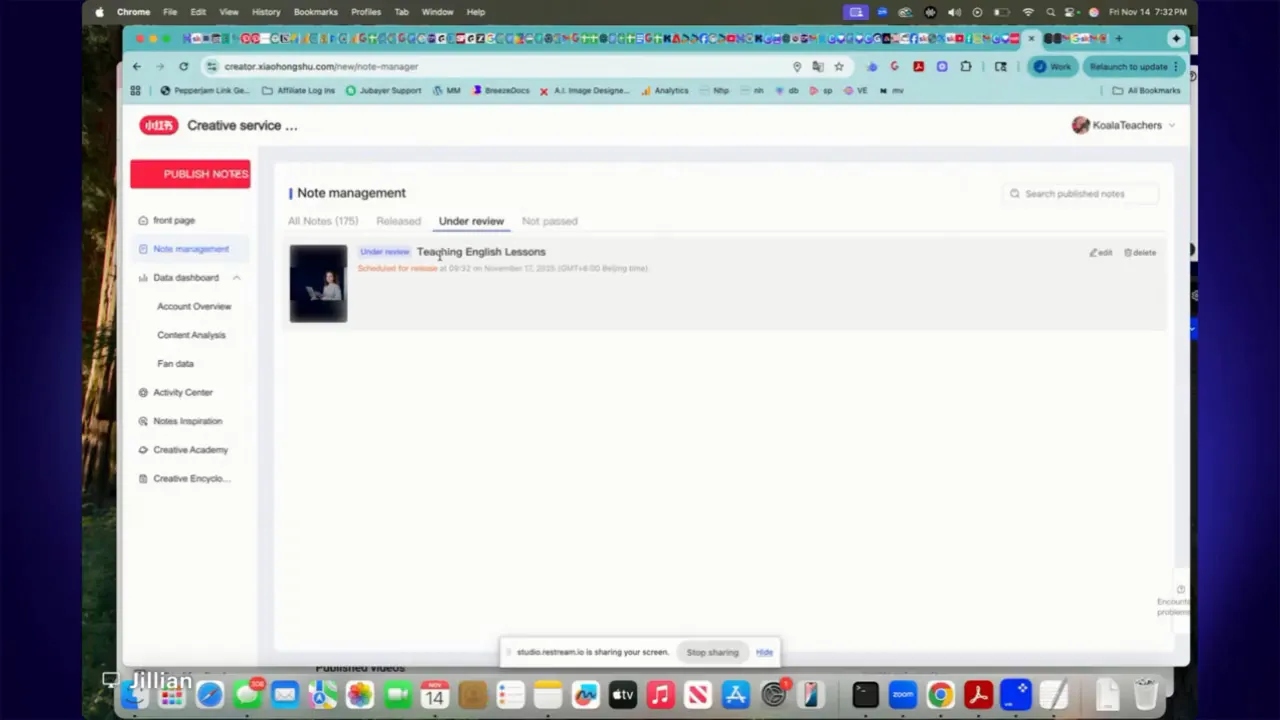
8. Manage scheduled notes
Open Note Management to see all your drafts, scheduled posts, and published notes. Items scheduled for future release will show a status such as Under Review. From Note Management you can delete or edit scheduled items before they go live. Analytics for published notes are available separately if you want to track performance over time.
Troubleshooting and practical tips
- Translation resets: Some pages revert to Chinese when you open new sections. Use the browser translate tool again to switch back.
- QR codes: Keep your phone close by during the whole session; you may need to scan more than once when navigating to different areas of Creative Services.
- Time zone: Scheduled times are shown in Beijing time, so convert if you operate in a different zone.
- Live streaming: Live features are typically blocked if you are not connected to mainland China—plan alternative content types if you cannot access live streaming.
- Collections and groups: Use collections to organize themes and groups to push content to multiple people or channels, but set those up separately to avoid extra complexity while scheduling.
- Content labeling: Be accurate when marking AI-generated content, reprints, or fiction to avoid content moderation issues.
Next steps
Set up a simple posting calendar and use desktop scheduling to batch-create content for the week. If you also publish from mobile, consider syncing processes so everything is organized under the same collections and hashtags. For deeper insights, check note analytics to learn which types of notes perform best and refine your schedule accordingly.
Final note
Scheduling notes from a computer streamlines content creation and helps maintain consistency. With the QR connection, browser translation, and scheduling options in Creative Services, you can build a reliable publishing routine that frees up time for content that matters.
Leave a Reply